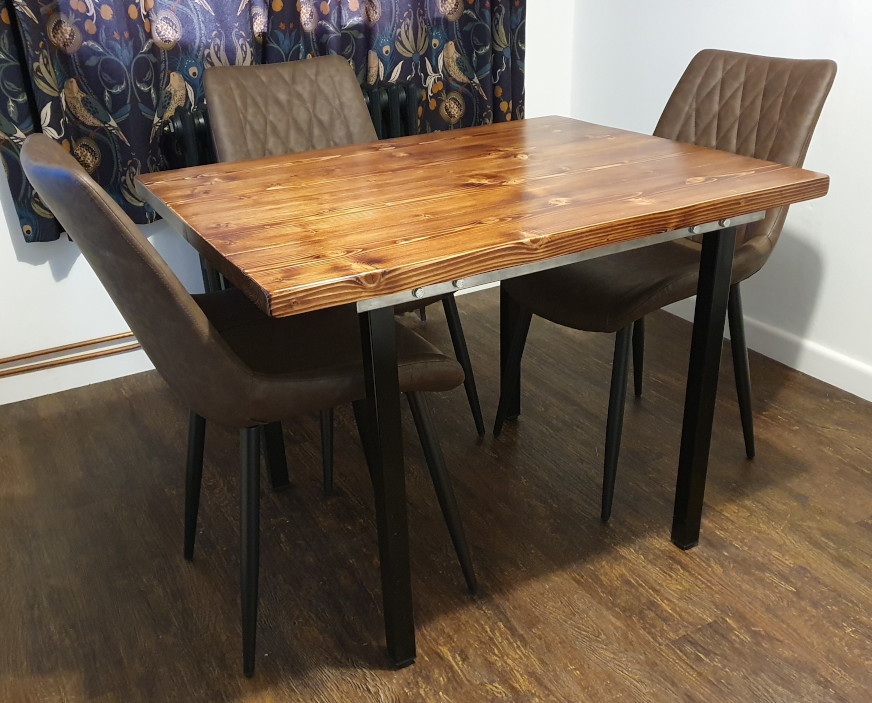
We'd been looking around for a suitable dining table but couldn't find anything that was quite right for the room. The tables we looked at were either too long or too wide, and all really quite expensive. So I decided to build something bespoke that would fit in the room exactly, and ordered a set of four chairs that I'd design the table to suit.
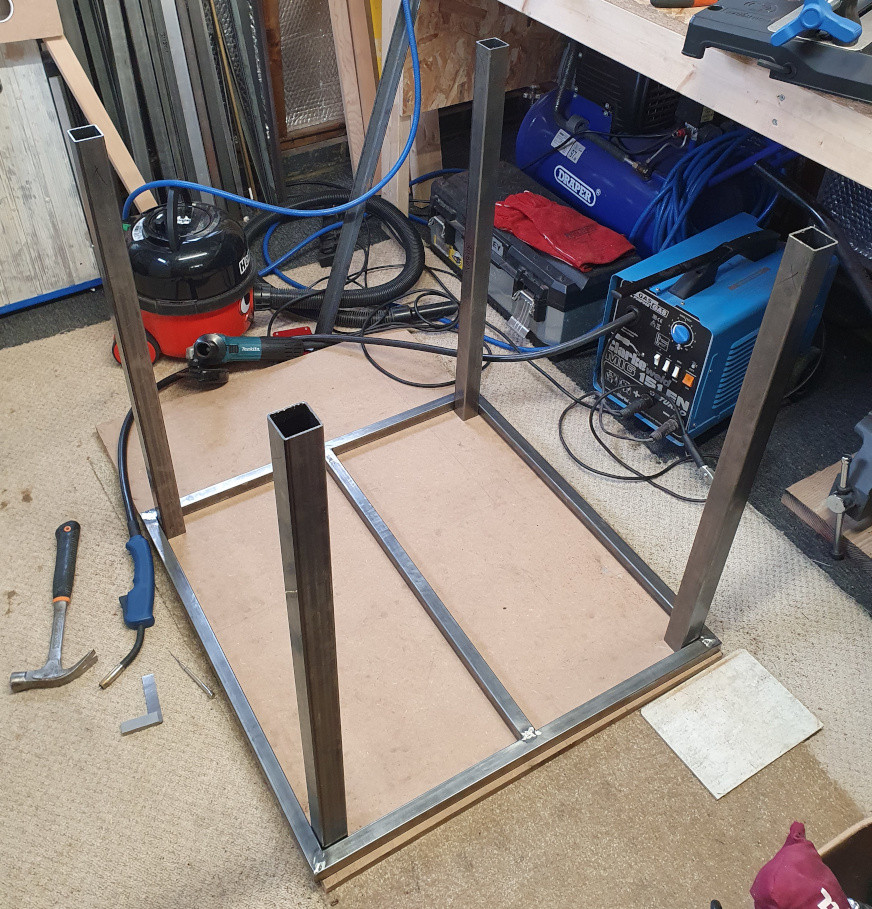
I was tempted to simply weld the legs to the frame, but knew this would make it impossible to get the assembled table through the dining room doorway. So I made up brackets to which the legs would be welded, and they would then bolt to the steel frame carrying the wooden scaffold planks.

I made the leg brackets from two 150mm lengths of 30mm angle iron, each cut at a 45 degree angle to form a mitre joint. I ground out a 5cm length of the fillet radius on each section of angle iron so the two mating faces of the square steel leg would sit flush inside the mitre joint. Using the angle grinder I cleaned up the areas of steel where I intended to weld.
I repeated this process once for each corner of the square frame, and then labelled each of the eight pieces of steel with the letters A through H. I put a corresponding label on the steel frame so I could make sure each piece went back in the same place. This was an important step, as I needed to drill holes to mount each of the brackets to the frame, and it was unlikely that each drilled hole would be in an identical position on each part.
With the steel brackets in place I measured and then marked the position of each hole using an automatic centre punch. I took each piece of steel over to the drill press and drilled the 8.5mm holes which would accept the M8 mounting bolts. Once each section of steel had been drilled and placed back in position, I used a scriber through each hole to mark its exact position on the steel frame.
With the frame now scriber-marked with the positions of where the sixteen holes needed to be, I centre punched and hand drilled each one with the frame clamped in a vice on the bench. I de-burred and cleaned up around each hole with some emery cloth. I could now bolt the steel brackets to the frame, and set the legs in position ready for welding.
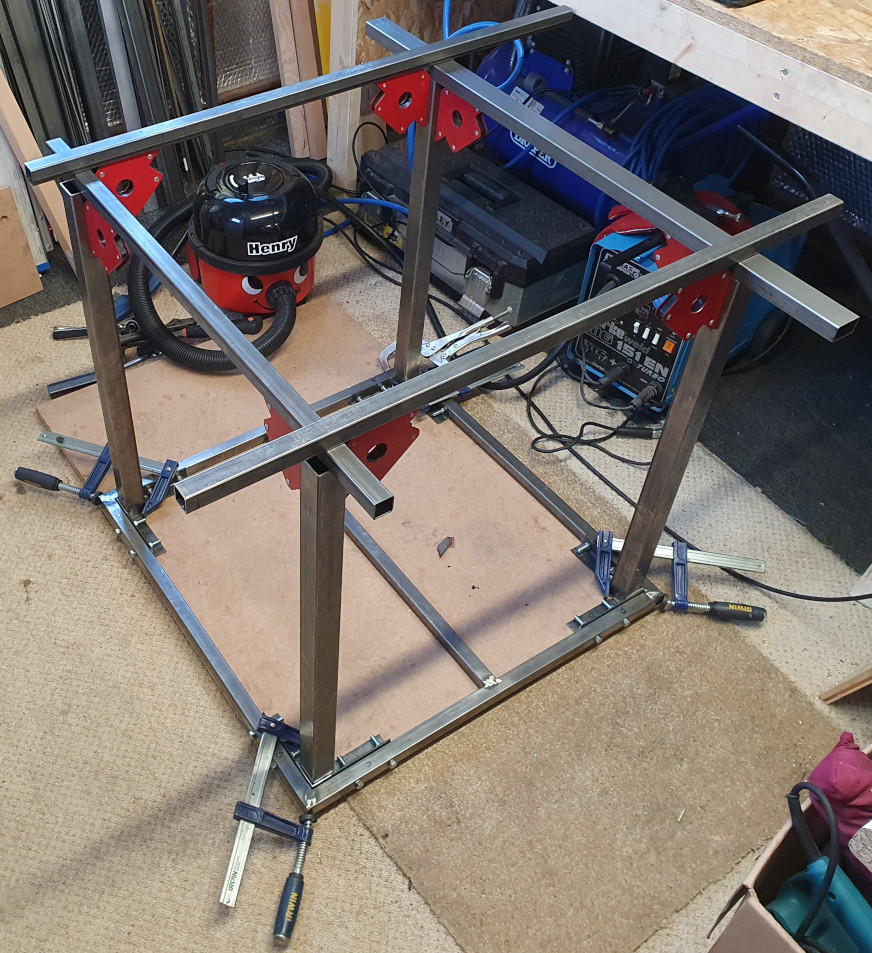
I carefully aligned all four legs using lengths of spare steel stock and several magnetic holders to keep them in position. I had to make sure the distance between each leg was 74.6mm, and that this measurement was consistent at both the top and bottom of each set of legs. I also used a spirit level to make sure the vertical position of each leg correlated with the horizontal position of the section of frame it faced.
I seam welded along the top of each steel bracket where it met with a face of the square leg, and placed a substantial tac-weld at each of the outer corners where the top of the leg met the insides of each bracket.
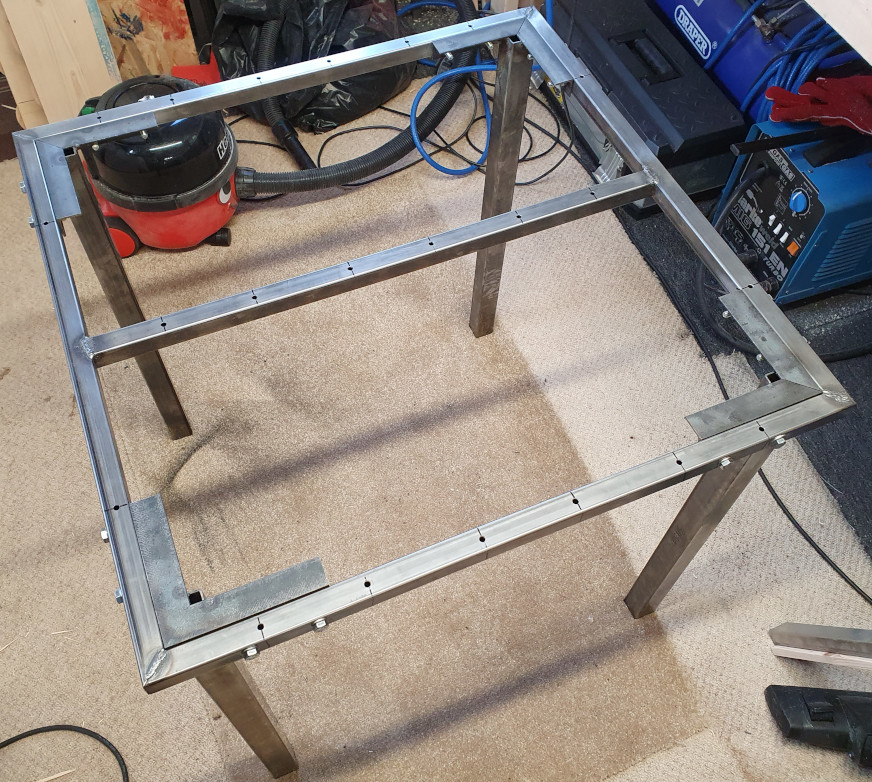
Now the legs were welded in position I flipped the frame so it was the right way up, and worked out where the mounting holes needed to be for fixing the planks. This was simply a matter of positioning the planks that I'd already cut and planed, and marking the most ideal screw positions with a sharpie. I removed the planks and transferred the positions to the top of the steel using an engineer's square and scriber, and penned over the scriber markings for clarity.
I centre punched each position and hand drilled the twenty-two holes using a 5mm HSS bit, removing the burr from below with a countersinking bit, and cleaned up further with emery cloth.

I needed the scaffold planks to form one solid piece of wood, so I fitted a fresh blade to my circular saw and cut along the lengths using a guide to form straight and square edges that would mate cleanly. I tried to achieve this using the electric planer, but there was a slight curvature to the sides of the planks that the planer followed, which resulted in slight gaps between the planks when they were aligned - so cutting a fresh straight edge was the only way to have them mate seamlessly.

Using a biscuit joint cutter in the router I made a slot that ran most the length of each of the joining planks, and inserted several biscuits in each joint.
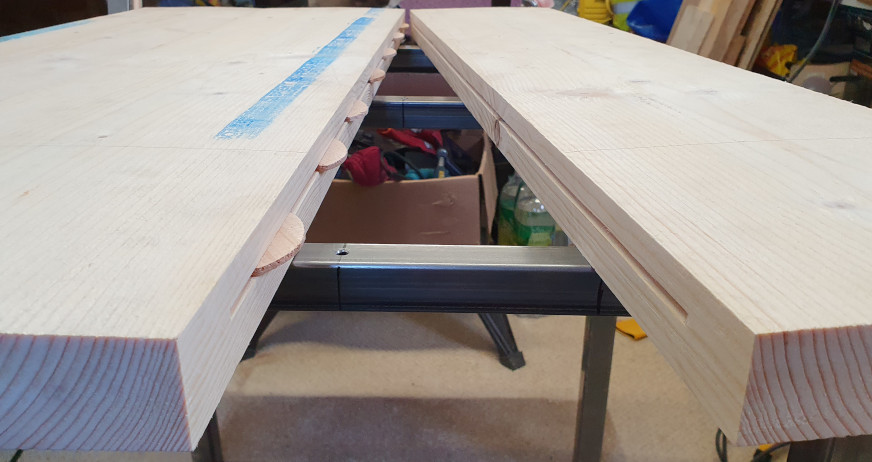
The joints were then glued and the planks pushed together to complete the formation of a solid wooden table top. The freshly glued planks were aligned so they were square to the steel frame, and clamps were used to secure the two outermost planks in position.
From below, while lying on the floor, I carefully screwed into each plank making sure not to compress the steel too much. I couldn't do any more work until the glue had set, so I waited until the following day to begin sanding the surface and rounding the edges.
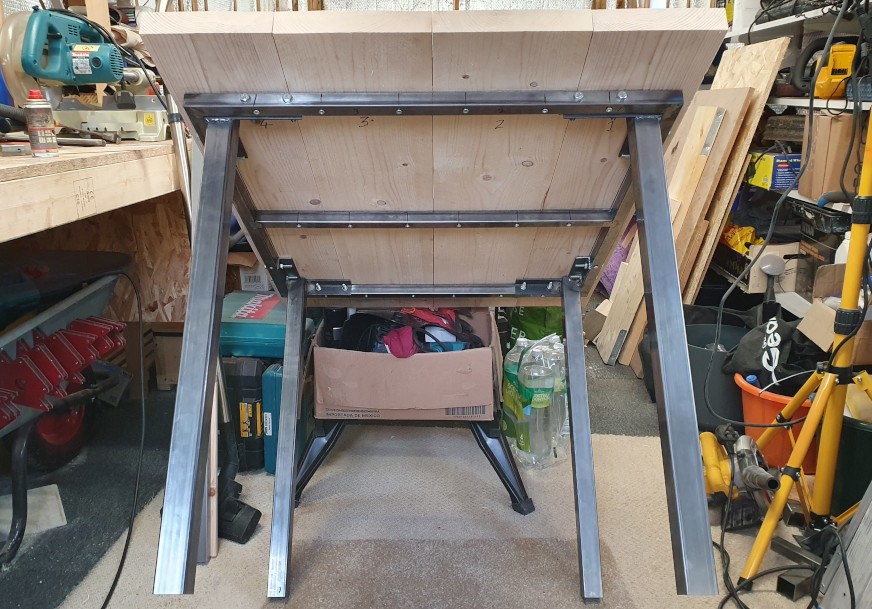
At this point it was now a functional table that just needed a wood finish, and the steel legs painting. I'd ordered some plastic inserts with adjustable feet to cap the steel legs, these would make it easy to adjust and prevent wobble if placed on an uneven floor - they could also be used to add an additional centimetre in height should this be required.

Having belt sanded the scaffold planks as flat as I could get them, I then used a 120 grit sandpaper on an orbital sander to smooth out the surface and round off the edges and corners. This was followed by hand sanding with a 240 grit paper.
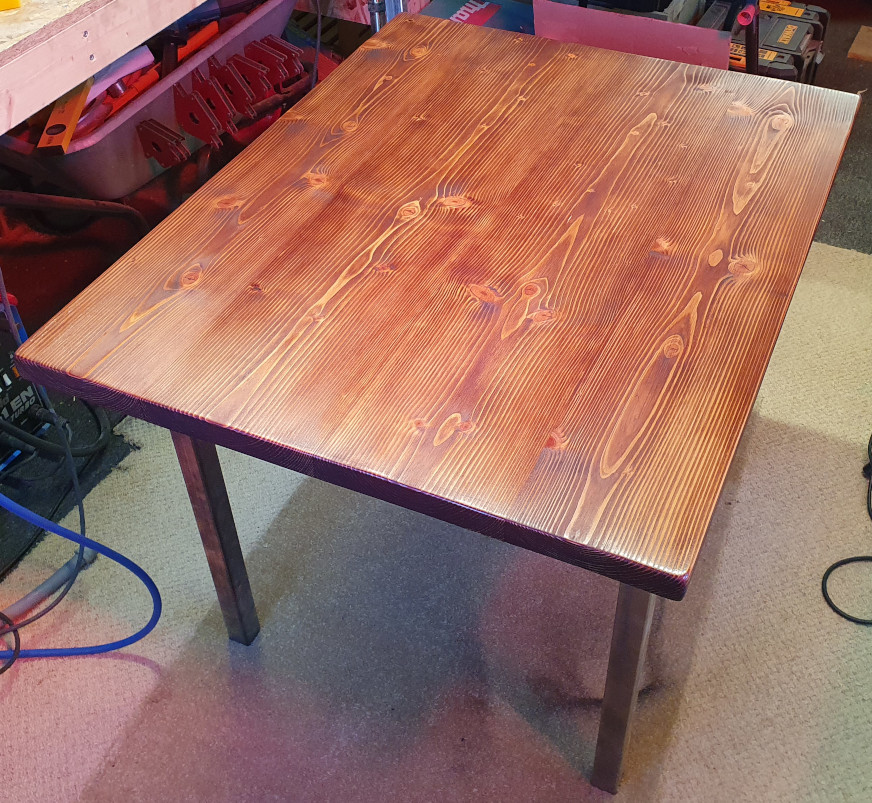
I applied two coats of Liberon spirit-based wood dye in medium oak, which was followed some hours later with two coats of Tung oil, applied with a lint free cloth. This resulted in the slightly rough matt finish as shown above.
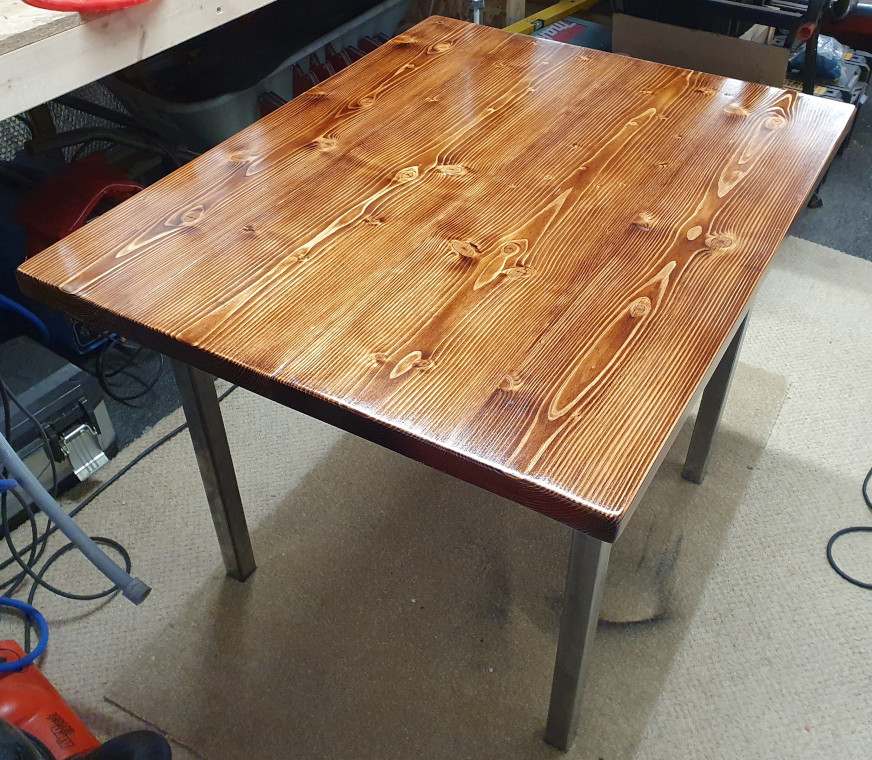
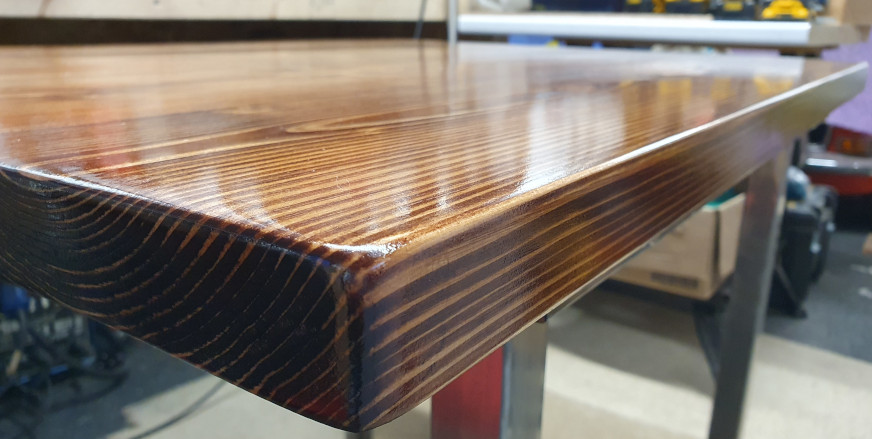
Several more coats of Tung oil were applied, initially sanding between coats with 240 grit sandpaper, then later with 0000 grade wire wool. This achieved a nice polished finish and should protect the wood against moisture damage from spills or when cleaning.

Now the top was finished, I unbolted the legs so they could be painted. I used a wire brush to clean up around the welds and prepared the surface of the entire leg by sanding with 180 grit emery cloth.
It was too wet and windy outside to paint, so I screened off a section of the workshop using a pair of old curtains suspended from hooks in the ceiling beams. I suspended the legs ready for painting, although the curtain-restricted workspace only allowed me to paint them in pairs. I gave the legs a good blowing over with the air gun to remove any surface dust remaining from the preparation.
I purchased three cans of grey primer, and four cans of gloss black enamel paint from Halfords. I was only painting the legs, so figured on one 300ml spray can being sufficient to finish one leg. So I applied two coats of primer to each leg, and the following day two coats (an entire can) of the gloss black finish. I'd used Halford's enamel spray paint on a previous project and found it produced a nice durable finish, which was also the case on this occasion too.
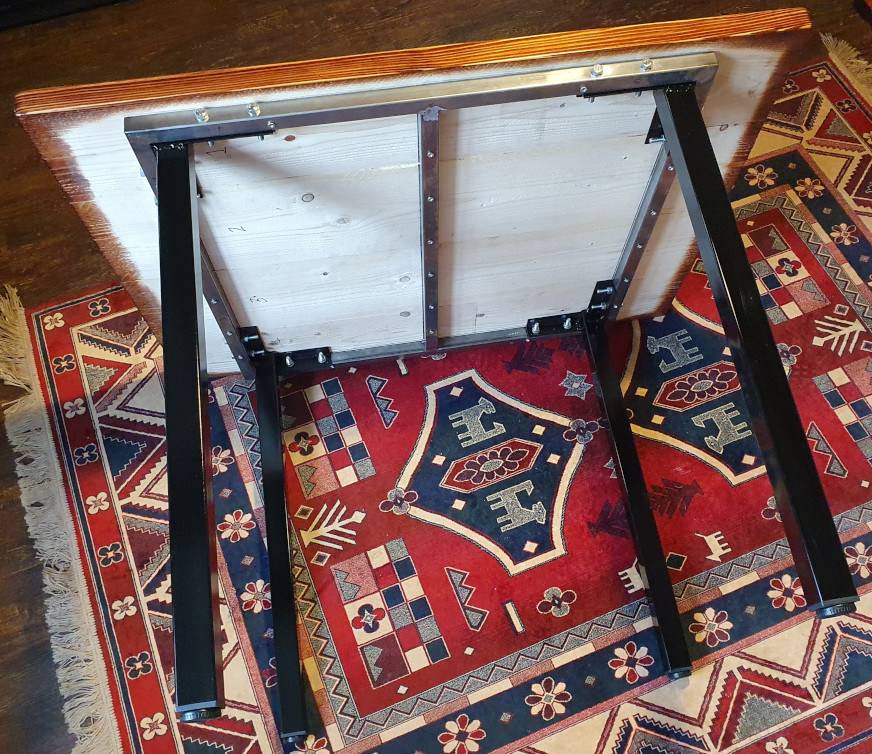
I gave the paint twenty-four hours to cure, then the following afternoon took everything into the house to be assembled. I pushed a plastic end-cap foot into each of the legs, and then proceeded to bolt them to the steel frame of the table. I added a stainless steel washer to the nut-side of each bolt to prevent damaging the recently painted surface.
It was now a complete and useable table! At some later stage I'll apply a few coats of Tung oil to the underside, and spray the unpainted steel frame with a clear lacquer to prevent corrosion.
